

Simple setups, soft light, and sweet reveal ideas that look great on camera—without the cleanup.
Planning a gender reveal at home?
Keep it calm, cute, and photo-ready with easy gender reveal ideas you can set up in minutes—think cupcake center bites, a tiny banner pull, or one balloon-in-a-box moment.
This guide focuses on minimal-mess options that look beautiful on camera (hello, window light), plus a short day-of timeline and a five-shot checklist so you’re actually in the photos—not managing them.
Choose one reveal, keep a simple backup, and enjoy the moment.
Quick Planning Checklist (1–2 minutes to skim)
Skim this, pick your spot, and you’ll be ready in minutes without overthinking it.
Pick your moment: slice a dessert, pop a box, pull a banner, lift a lid.
Choose your spot: by a window or doorway for bright, even light.
Assign jobs: one person films vertical, one snaps photos, one cues the reveal.
Hide the color: envelope to a trusted friend/bakery or label “Do Not Peek.”
Backup plan: letterboard + baby shoes photo in case nap time strikes.
Cleanup kit: trash bag, lint roller, and a damp cloth (you probably won’t need more).
Pro Tip: Set your phone to the highest video quality available and wipe the lens with a soft cloth—instant glow.

15 Easy At-Home Reveal Ideas (Minimal Mess)
Choose one idea you love and a simple backup so the moment stays calm and joyful.
Banner pull.
Pre-roll a small “It’s a ___!” banner like a scroll and secure with a tiny tape tab.
Stand facing a window, count down, then pull toward the camera so the words fill the frame.
Hold the smile for three beats so your helper catches both photo and video.
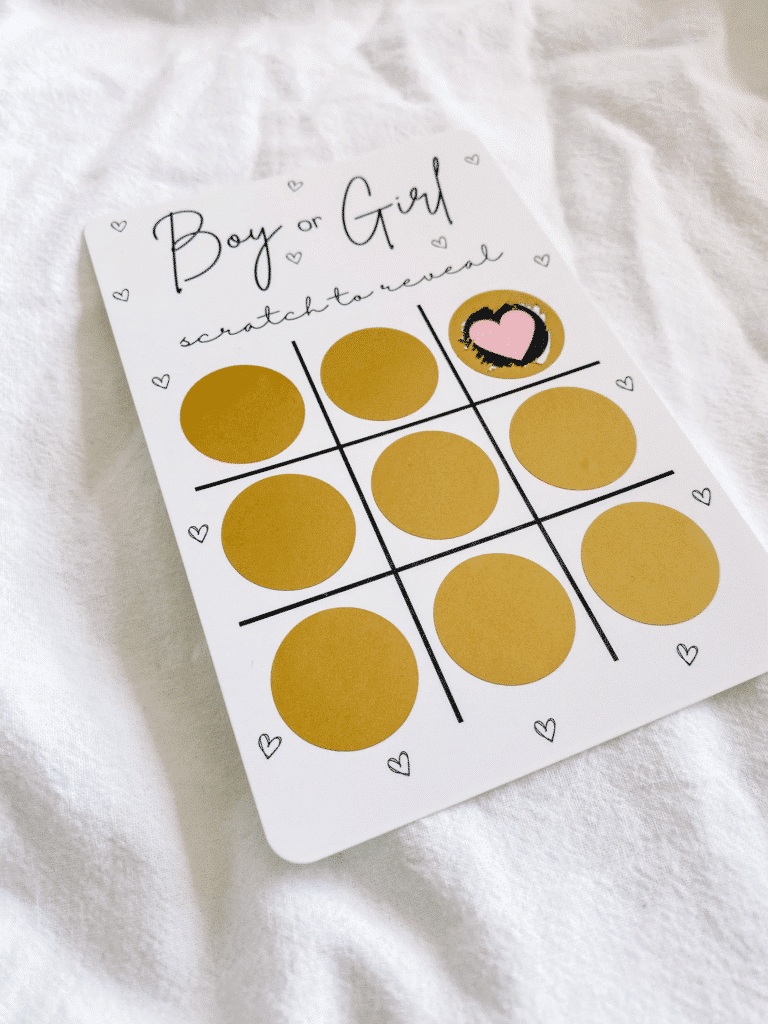
Scratch-off cards.
Hand each guest a scratcher (or mail to grandparents and flip on FaceTime).
Do a quick “ready…go!” so reactions happen at once.
Snap one overhead photo of the cards afterward for your album.
Puzzle flip.
Order a 12-piece photo puzzle that reveals “It’s a ___.” Let a sibling place the final piece while you two react.
Photograph the finished puzzle flat on a table near a window for a clean look.
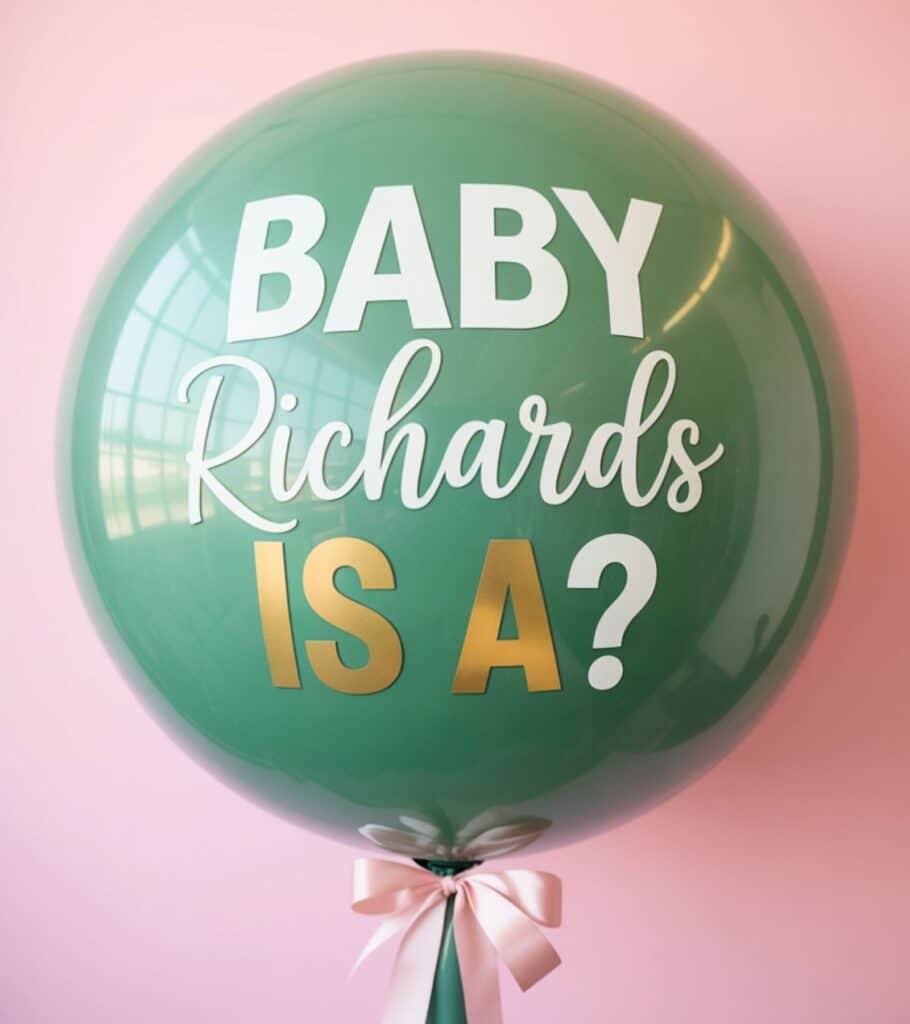
Balloon box (tissue only).
Use a shoe-box-sized container with a single helium balloon tucked under pastel tissue.
Lift the lid together and pause so the balloon rises between you.
Bonus: zero confetti cleanup.
Cupcake center.
Ask the bakery to fill the center with colored frosting.
Stand shoulder-to-shoulder, take one bite together, and tilt the cupcake so the filling faces the lens.
Then do a second quick bite for backup.
Confetti poppers (porch/outdoors).
Step outside, angle slightly up-wind, and pop on “three.”
Take one “after” photo with the confetti on the ground, then head back in.
(Outdoor-only; choose biodegradable.)
Ribbon pull.
Place a long ribbon in your color inside a neutral gift bag.
Pull straight up and let the tail drape while you smile at each other first, then the camera.
Easy, tidy, cute.
Streamer shower.
Hang streamers inside a doorway and walk through slowly while your helper shoots in burst mode.
It reads festive on camera with minimal cleanup.
Tiny piñata (tissue, not candy).
Fill with a few tissue tassels instead of candy.
One light tap is enough—no sweeping marathon.
Great for a toddler helper.
Book reveal.
Wrap a board book and add a colored inner page or ribbon.
Unwrap together, open to the first spread, and angle it toward the lens for a clean, readable shot.
Balloon dart (one balloon).
Outdoors only.
Use one pre-filled confetti balloon on a stand, pop with a pin on a stick, then take a close-up of the confetti on the grass.
Keep it quick for neighbors and pets.
Photo frame flip.
Place two prints back-to-back in a frame; flip to reveal the color.
Works beautifully for a quiet living-room reveal and flat-lay photos afterward.
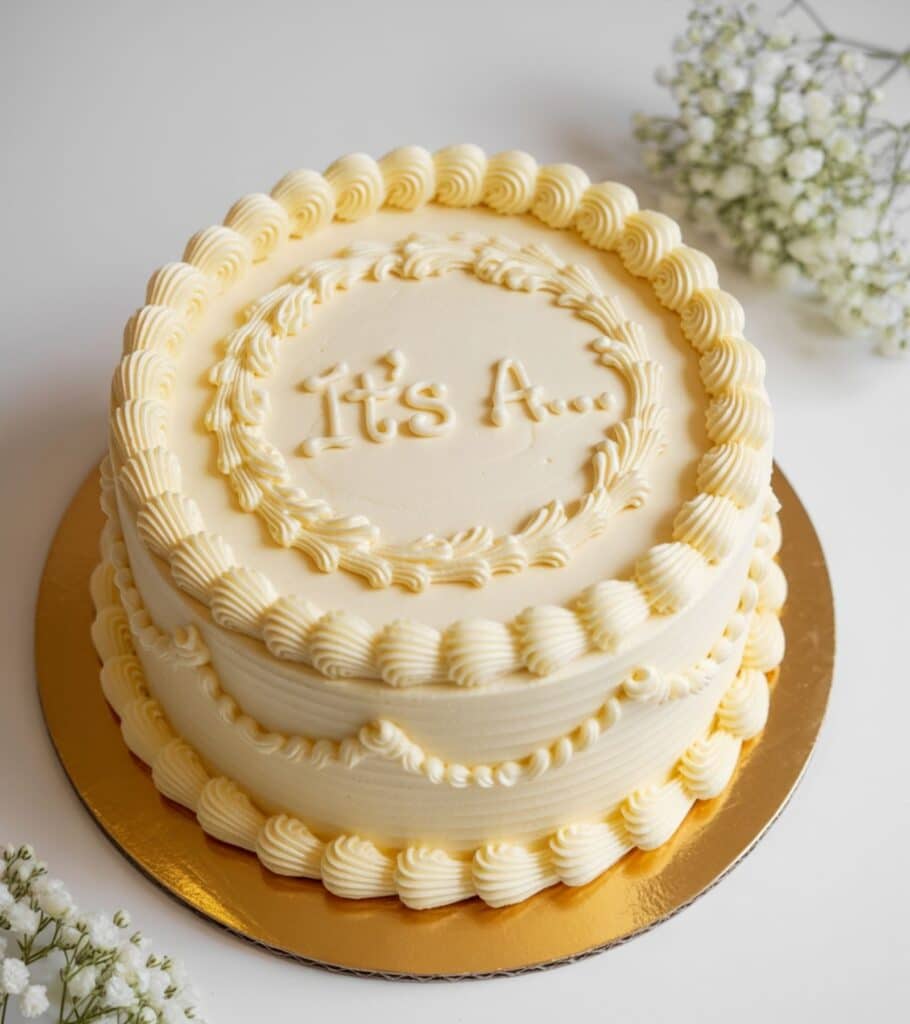
Tea towel reveal.
Hide a petite cake under a pretty towel.
Lift together and lean in behind it so the frosting color is the star.
Take one tight crop of the cake top for Pinterest.
Ribbon “smoke” (no fire).
Fill a box with curled paper ribbons in your color.
Lift the lid and give the box a tiny shake so the curls peek out.
All the drama, none of the mess.
Mini marquee letter.
Place a small light-up “B” or “G” under a cloche.
Lift for the ta-da, then set the cloche beside it for a styled detail shot.
Pro Tip: If you use confetti or powder, keep it outdoors only and choose biodegradable. A quick hose spritz makes cleanup painless.
Which Reveal Fits Your Day?
| Reveal | Setup Time | Mess Level | Photo Difficulty | Best For |
|---|---|---|---|---|
| Cupcake Center | 5 min | Low | Easy | Indoors, tiny group |
| Mini Cake Slice | 10 min | Low | Easy | Classic photos |
| Balloon-in-a-Box | 10 min | Low | Easy | Small spaces |
| Scratch-offs | 5 min | None | Easy | FaceTime with family |
| Porch Confetti Pop | 5 min | Medium* | Easy | Quick outdoor moment |
*Confetti outdoors only; choose biodegradable.

Photo-First Reveals (Pretty Pics, Zero Chaos)
These setups are built to photograph beautifully using nothing more than window light.
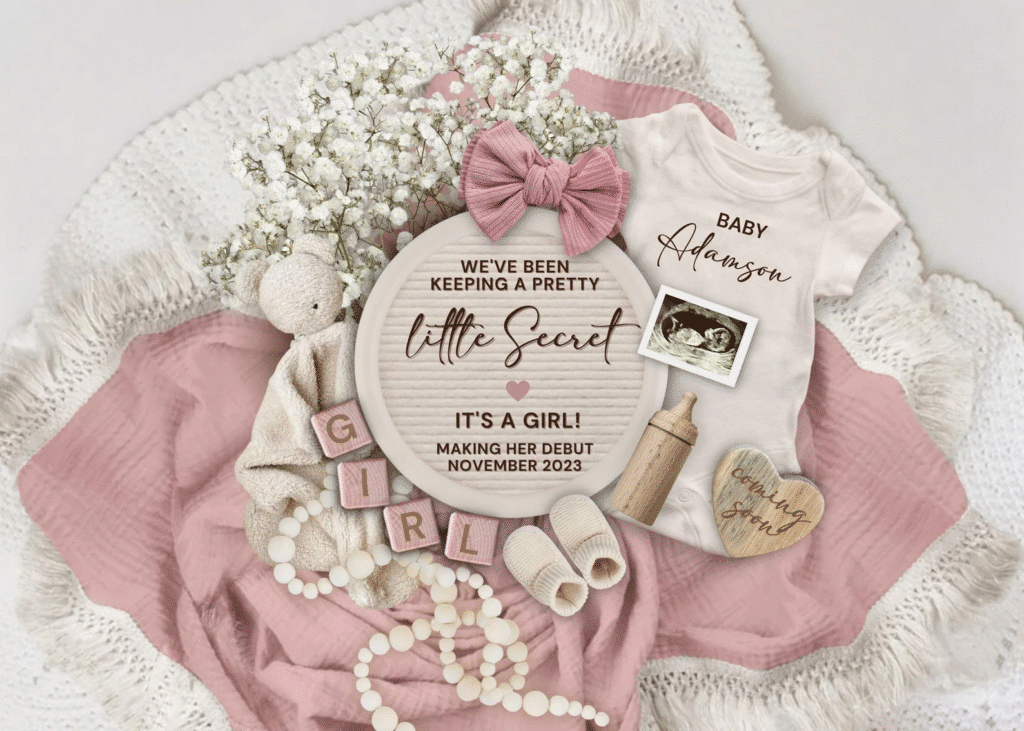
Letterboard moment.
“Baby ___ arriving ___” with tiny booties in color.
Keep everything neutral and face the window.
Balloon arch + mini box.
WANT TO SAVE THIS FOR LATER?
Neutral arch, small box at your feet—open + smile.
Step in close for a waist-up crop.
Cake slice close-up.
Cut a petite cake and hold the slice toward the camera; lean in together behind it.
Baby shoes + ribbon.
Tie color ribbon on neutral baby shoes; hands-in-frame shot for a timeless feel.
Sonogram + bow.
Ultrasound taped to a neutral mat with a tiny bow in color; hold at chest height.
Mug reveal.
“Mama/Papa” mugs—lift to show colored marshmallows inside; capture the laugh.
Storybook page.
Open a book with a pastel page; write “It’s a ___” on a sticky note; angle to the lens.
Balloon bouquet (3).
Two neutrals + one colored balloon hidden in the middle; slow turn to reveal.
Confetti plate (no toss).
Lift a cloche to reveal confetti on a plate (no throwing); snap the detail.
Window silhouette.
Hold a colored onesie against a bright window for a soft, dreamy shot.
Pro Tip: Shoot near a window, turn off overhead lights (they’re orange), and face the light.
Gender Reveal Photo Prompts (Quick Poses That Always Work)
A few tiny adjustments to where you stand and what you hold make every photo cleaner.
Face a window; keep the reveal prop at chest height so it’s easy to see.
Do a hands-only shot first (envelope, ribbon, knife on cake), then a full-smile shot.
Capture three frames of every beat—wide, medium, close-up—so you have choices later.
After the reveal, hold a 10-second happy hug while your helper keeps filming—those frames are gold.
Grab one flat-lay of your letterboard, shoes, ultrasound, and ribbon color.
Pro Tip: Turn off overhead lights to avoid orange shadows; window light only.
Siblings & Pets: Sweet, Simple, Supervised
Keep it short, gentle, and guided so little helpers (and pups) can shine on camera.
Big brother/sister tee under a zip hoodie. Unzip on “three.”
Prediction scoreboard. Tally “team boy/girl” before the reveal; snap the final.
Ball toss reveal. Sibling tosses the neutral balloon while you lift the colored one.
Pup bandana. Dog sits for a treat; bandana says “It’s a ___.”
Cookie reveal. Give sibling a cookie with colored inside; bite + smile.
Pro Tip: Do a practice run with your helper so they know where to stand and what to do.
Keepsakes You’ll Actually Keep
Pick one small memento you’ll be happy to see on a shelf long after the party ends.
Guest prediction cards you’ll love reading later (date, weight, name ideas).
Signed storybook (use a neutral classic as a “guest book”).
Polaroid wall. 4–6 instant photos on a mini clipboard for the nursery.
Envelope + letter. Seal the scan-day envelope and your feelings in a small shadow box.
Cake topper in a frame. Pop it into a 5×7 with your reveal photo.
Pro Tip: Snap one horizontal and one vertical photo of each moment—better for prints and for Reels.
Simple Day-Of Timeline
Short, clear beats so you can relax, enjoy, and still get the shots you want.
T-2 hours: tidy one room, set up reveal prop, clear the window area.
T-30 minutes: lay out outfits, wipe phone lens, quick lighting check.
T-10 minutes: assign jobs (video, photos, cue). Deep breath. Water sip.
Reveal: do it once—then immediately do a second tiny take (just smiles) for backup.
After: 5 minutes of portraits; then eat dessert. You did it!
Shot List (Screenshottable)
Capture these five moments and you’ve told the whole story—no captions needed.
- Hands holding the sealed envelope
- Wide shot of the setup (window behind camera)
- The reveal moment (burst/slice/pull)
- Close-up of the color
- Hugs/laughter afterward
- One posed portrait; one silly
- Details: shoes, letterboard, dessert, ultrasound
Safety & Clean-Up Notes (Tiny but Important)
A couple of smart choices here protect your home, your guests, and your sanity.
- Use confetti or powder outdoors only.
- Follow manufacturer instructions; avoid open flame and wildfire-risk areas.
- Consider neighbors, pets, and noise.
- Choose biodegradable confetti and keep a small trash bag nearby.
What to Buy (Budget-Friendly, Neutral-First)
Just the basics you’ll actually use today—and reuse for milestone photos later.
- Neutral balloon garland kit (works for any theme later)
- Small letterboard + set of numbers
- Mini cake or 6 cupcakes (bakery or grocery)
- Prediction cards + fine-tip pen
- Acrylic cake stand or simple wood board
- Optional: one confetti popper for an outdoor porch moment
Pro Tip: If a friend is handling the secret, ask them to text “mission complete” once the color is hidden—no anxious follow-ups needed.
Tiny Troubleshooting (Because Real Life)
If things go sideways, these quick pivots keep the experience sweet and low-stress.
Nap crash: shoot a letterboard flat-lay and a parent selfie; do the “big” moment later.
Shy sibling: let them hold a stuffed animal with the bow color—no pressure.
Bad light: move closer to a window or open a door; turn off overheads.
Confetti in hair: a lint roller + a laugh—done.
FAQs
Fast answers to the most common “wait, but what if…?” questions.
When should we do it?
Many families reveal around 18–22 weeks, but timing is totally up to you and your scan schedule.
Can we keep it super small?
Yes—just you two, a tripod, and a cupcake reveal totally counts.
What if we don’t want to know on the spot?
Have your baker color the cake and do a private slice photo—announce later with a letterboard pic.
Is confetti okay indoors?
We recommend outdoors only—tissue cleanup is easier and safer.
How long should the reveal take?
The moment itself can be under a minute. Plan 10 minutes after for quick portraits while everyone’s still smiling.
Can we do this after dark?
Yes—stand in a well-lit doorway (or by a bright lamp bounced off a wall) and keep subjects close to the camera. Skip confetti at night.
What if the color leaks early?
Don’t stress. Switch to your backup (letterboard + shoes with ribbon color) and do the special slice or balloon box just for photos later.
A Calm, Happy Reveal (That Feels Like You)
Keep it simple, savor the moment, and let the photos tell the story.
You don’t need a production—just good light, one sweet idea, and the people who love you.
Choose one reveal, keep a backup in your pocket, and take the five must-have shots.
However you share the color—cupcake bite, tiny banner pull, or one balloon in a box—what you’ll remember most is the look you gave each other.
✨ Read Next: What to Pack in Your Hospital Bag — Essentials for Mom, Dad & Baby
Preparing for labor? Don’t wait until the last minute!
This checklist covers everything you’ll need for a comfortable hospital stay — from must-have documents and cozy clothes to newborn essentials and a few often-forgotten lifesavers.