

Timeline, menu math, décor map, photo list, and a day-of schedule that respects naps
Here’s your simple roadmap to a sweet first birthday—clear steps, nap-friendly timing, easy menu ideas, and décor that photographs beautifully.
If you’re a skimmer, this guide pairs with my free first birthday planning checklist so you can print the steps and check them off.
A quick pep talk
Perfection isn’t the goal.
A happy baby, a few great photos, and a room full of people who love you—yes, please.
This plan trims the decision fatigue and gives you the order of operations so you can enjoy your little one (and actually be in the pictures).
What you’ll get here: realistic timelines, budget guardrails, cold-forward menu ideas with portion math, décor that photographs well, a layout that keeps traffic flowing, and a gentle two-hour schedule that fits around naps.
P.S. Don’t want to copy this into Notes? Snag the one-page checklist and tick boxes instead.

The Timeline (expanded + why the pacing works)
A simple week-by-week path so you make decisions in the right order and skip last‑minute stress.
8–10 Weeks Out — Foundations
Set the big pieces now—date, budget, theme, and venue—so everything else (orders, shipping, and nap‑friendly timing) clicks into place.
- Pick a date/time around naps.
- Decide at home vs. venue (backyard, community room, park with restrooms).
- Set a budget with loose ranges (see below).
- Choose a theme and color palette (2–3 colors + 1 neutral/metallic).
- Start a planning doc: theme, shopping lists, links, RSVPs, photo list.
Decide your guest count range now (e.g., 12–15) and cap it—your menu, seating, and budget will thank you.
6–7 Weeks Out — Guest List, Invites, and Layout Draft
Clarify who’s coming and map the room flow now so every order and décor choice fits your space and budget.
- Build your guest list; gather addresses/phone numbers.
- Design the invitation; set RSVP for 10–12 days before.
- Sketch your layout zones (welcome, food/drink, photo spot, play corner, high-chair cake).
- If outdoors, plan a weather backup.
Your layout guides what you buy—no random décor that doesn’t fit.
Tiny win: Order a simple “ONE” banner and decide whether you’ll DIY a balloon garland or buy a kit.
5–4 Weeks Out — Orders, Menu Outline, Favors
Place key orders and outline a cold‑forward menu now so shipping buffers are covered, substitutions are easy, and next week’s prep is simple.
- Send invitations.
- Order key décor: backdrop, banner, garland kit, cake topper, high-chair banner.
- Outline a cold-forward menu (snack board + one hearty bite + cake).
- Choose favors (bubbles, stickers, mini board books, or a wrapped cookie).
- Decide on help (ask a teen neighbor to refill drinks or snap photos).
Shipping buffers + make-ahead food keep you out of the kitchen on party day.
Tiny win: Confirm table sizes and gather table linens/stands you already own.
3–2 Weeks Out — Headcount, Cake, Outfits, Non-Perishables
Lock in numbers, confirm sweets, and gather supplies so your portions, seating, and orders match reality—not guesses.
- Nudge RSVPs; update headcount (adults/kids).
- Order cake + smash cake (sizes below).
- Buy non-perishables: plates/napkins/cutlery, cups, tablecloths, candles, serving tongs, tape, command hooks, trash bags.
- Plan outfits (comfortable, within palette).
- Make your photo list and assign a “photo buddy.”
Accurate numbers = right cake size, seating, and food amounts.
Tiny win: Label one bin “Party” and stage supplies together.
10–7 Days Out — Staging and Small Prep
Stage the space and test key details now so party-day setup feels like muscle memory, not a puzzle.
- Stage serving pieces to check spacing.
- Assemble favors; pre-tie tags.
- Do a balloon test (inflate a few to confirm shades).
- Tidy the photo zone (declutter background; confirm natural light).
Visualizing early reveals gaps while there’s time to fix them.
Tiny win: Pre-string banners and pre-cut command hook tape.
72–24 Hours — Perishables, Garland, Backdrop, Pickup
Handle perishables and build the backdrop so you can wake up to a nearly finished party.
- Grocery shop perishables; wash/chop fruit/veg; line containers with paper towels.
- Build the balloon garland (store indoors; top up morning-of).
- Set the backdrop and do a quick test shot on your phone.
- Pick up cake; refrigerate buttercream or keep cool if shelf-stable.
- Lay out outfits, bibs, wipes, drop cloth.
Most “work” is done before guests arrive—hello, calm host.
Party Day — Light, Short, Sweet
Keep it simple and nap‑friendly; follow the rhythm, protect the cake moment, and enjoy your baby.
- Follow the two-hour schedule below.
- Keep drinks and kid water accessible.
- Ask your helper to refresh platters and run through the photo list.
After — Close the Loop
Wrap things up while memories are fresh—photos shared, gifts logged, and keepsakes saved.
- Pack leftovers in to-go containers.
- Log gifts for thank-yous.
- Save keepsakes (invite, candle, cleaned topper) in a memory box.
Make the Plan Plug-and-Play
You just saw the whole planning flow—now let it live on one page.
Print the First Birthday Party Planning Checklist and check boxes as you go. It’s the same order of operations here, timed around naps and real life.
Includes: week-by-week timeline • menu prompts + portion math • décor & photo cues • two-hour day-of schedule
Budget Guide (ranges + where to save/splurge)
Set guardrails first so every decision—venue, décor, menu—fits your comfort zone without surprise add‑ons.
Typical ranges
- Food & drinks: 35–45%
- Décor/balloons/flowers: 15–25%
- Cake/dessert: ~10%
- Paper goods/disposables: 5–10%
- Venue: 0–30%
- Activities/entertainment: 0–10%
- Photos (DIY or pro): 0–20%
Save on: home/park/community room; one statement backdrop; cold-forward menu.
Splurge (if you want): a 45-minute mini-photo session during cake, a great cake stand or custom topper, or a shimmer wall/marquee letters if photos matter most.
Theme → Palette → One “Wow” (cohesion without overthinking)
Choose one direction and let it do the heavy lifting—color, cake, and backdrop will practically choose themselves.
Pick a theme you genuinely like:
First Trip Around the Sun, Berry Sweet One, One Happy Camper, My First Rodeo, Little Sunshine, Groovy One, Winter ONEderland, Our Little Pumpkin (seasonal).
Lock a palette (2–3 colors + neutral/metallic).
Choose one wow: balloon garland, shimmer wall, or oversized “ONE.”
Need more ideas? Browse my 52 First Birthday Themes for cute, modern options that fit any season or budget.
Timing Around Naps (sample flows that work)
Short, predictable blocks keep babies regulated and give you the best chance at happy photos.
- Ideal party length: 90–120 minutes.
- Start 30–60 minutes after a nap or try late afternoon.
- Gentle flow: Welcome → Snack/Play → Photos → Cake → Play → Favors.
If baby naps 10:00–11:15: party 12:00–2:00 (lunchy snacks; cake at ~1:00).
If baby naps 1:30–3:00: party 3:30–5:30 (snack boards; cake at ~4:30).

WANT TO SAVE THIS FOR LATER?
Layout That Makes Hosting Easy (5 zones + placement tips)
Clear zones reduce crowding, make photos easier, and help guests help themselves.
Welcome & gifts — small sign, card box, gift drop; near the entrance so bags don’t clog the kitchen.
Food & drinks — one 6–8 ft table/counter; water at kid height; keep hot drinks away from play.
Backdrop/photo spot — face toward a window for soft light; banner + garland at adult eye level; leave room for a family group shot.
Baby play corner — foam mat, board books, stackers, chunky blocks; visible from the food table.
High-chair cake zone — drop cloth under chair; wipes/bib/towel ready; close to the backdrop so photos match the theme.
Invitations & RSVP Tracking (what to include + a simple tracker)
Set expectations early—time window, food notes, and RSVP date—so you’re not fielding texts the week of.
Send: 4–5 weeks out (6–8 for holidays).
Include: date/time, address/parking, light menu note, RSVP by date, allergen heads-ups, and “short party window” so expectations are clear.
Simple tracker columns: Name | Adults | Kids | Allergies | RSVP | Gift | Thank-you sent. (A notes app or Google Sheet is perfect.)
The Calm, Make-Ahead Menu (with portion math)
Build a cold‑forward spread that plates fast, survives the party window, and keeps you out of the kitchen.
For ~25 people (cold-forward, fuss-free)
Snack board: cheeses, crackers, hummus, grapes, cucumbers, pretzels
Hearty bite: mini croissant sandwiches or pinwheels (ham/swiss + turkey/cheddar)
Fresh sides: fruit cups or fruit “wands”; veggie cups with dip
Crunch: kettle or pita chips
Dessert: 8″ cake + cupcakes or all cupcakes + 4–5″ smash cake
Drinks: water (flat & sparkling), lemonade/tea, coffee; optional bubbly for toasts
Portion quick math
Adults: ~6–8 appetizer bites + 1 cupcake
Under-5s: half portions
Pinwheels: 4–5 per adult / 2–3 per child
Fruit/veg cups: 1 per person
Chips: 1 standard bag per 8–10 guests
Cupcakes: 1 per person + a few extras
Allergy friendly: Label “contains nuts/dairy/egg.”
If needed, order an egg-free smash cake.
Looking for hot and cold party bites? Browse my Kids’ Birthday Party Food for easy, make‑ahead ideas that pair perfectly with a short party window.

Cake & Smash Cake (sizes, transport, and mess-management)
Right sizes, smart placement, and a quick clean‑up plan make sweet photos (and less chaos).
- Order 2–3 weeks out.
- Sizes: 8″ cake ≈ 16–20 servings; add cupcakes as headcount grows. Smash cake 4–5″.
- Transport: keep the box flat on the car floor; use a chilly pack if warm out.
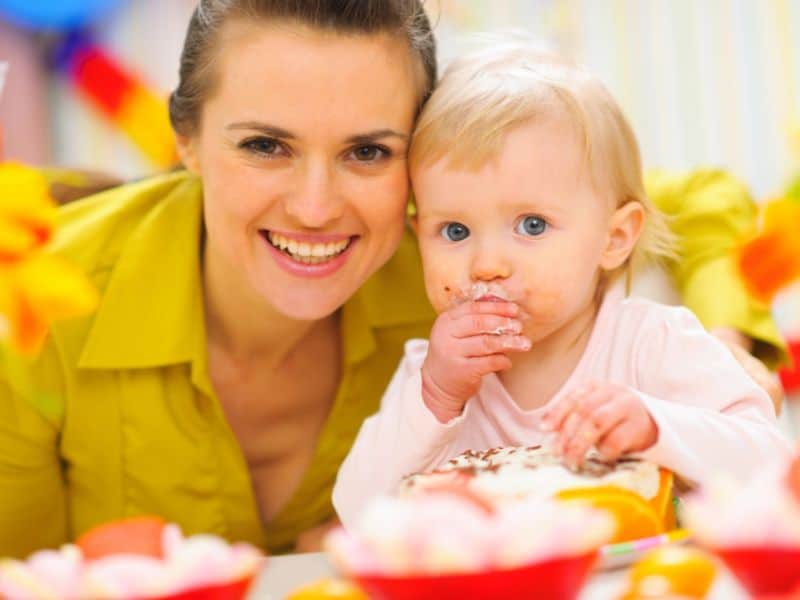
- Smash setup: high-chair near backdrop; drop cloth underneath; wipes + small towel ready; bib on; outfit change nearby.
- For hesitant babies: offer a small spoon or let them taste frosting from your finger first.
Décor That Photographs Beautifully (zone-by-zone specifics)
Think in scenes: entry, backdrop, table, and high‑chair—simple layers that read beautifully on camera.
Backdrop — Acrylic “one” or banner + balloon garland (mix 5″ + 10/12″ balloons; add a few fun shapes).
Hang with command hooks; angle toward a window; remove nearby wall clutter.
Food table — One runner, 2–3 bud vases/greens, one great cake stand, neutral plates/napkins.
Add small tent cards for allergens and cute names (“Berry Sweet Cupcakes”).
High-chair — Mini banner or tulle skirt that matches the backdrop; tuck the drop cloth so it barely shows in photos.
Entry — Small welcome sign + a few balloons to signal “you’re here!” (extra helpful for park parties).
Balloon timing — Build the garland the day before; top up morning-of with a hand pump.
Outdoors, secure with zip ties + fishing line.

Baby-Friendly Activities (0–3, low setup)
Low‑stakes, sensory‑friendly moments beat big entertainment every time at this age.
- Soft play corner: foam mat, board books, stackers, chunky blocks
- Bubble time: 5 minutes outside = 20 happy photos (do it twice if kids ask)
- Simple craft: sticker crowns for older toddlers at a small table
- Music moment: 2–3 favorite songs before cake to gather the room
The Photo Shot List (save to your phone)
Assign one helper and follow a tiny list—you’ll actually be in the pictures.
- Family at the backdrop (start while everyone’s fresh)
- Baby with cake—clean hands first, then messy hands
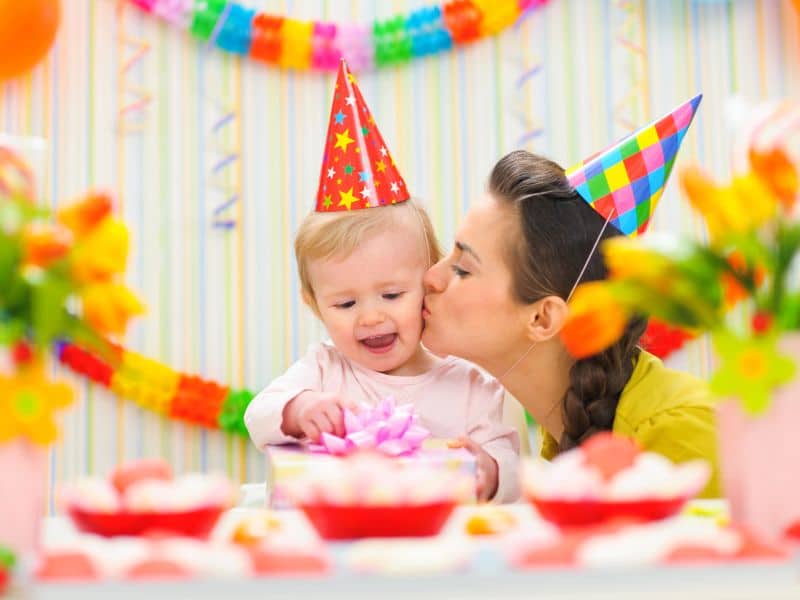
- Candle moment (only if baby’s into it)
- Baby + grandparents/godparents
- Baby + cousin/best friend
- Wide shot of the decorated space
- Detail shots: cake, banner, invitation flat lay, favor display
Assign a “photo buddy.” You host; they tap through the list.
Safety & Comfort (quiet prep for fewer “uh-ohs”)
A few five‑minute safeguards turn potential stressors into non‑issues.
- Keep small décor off low tables; avoid tiny trinkets in favor bags.
- Tape cords, block stairs, secure outdoor gates/yard exits.
- Set a quiet room for nursing/diaper changes.
- Stock a tiny first-aid kit plus extra diapers, wipes, and a change of clothes for baby.
- If outdoors, add shade, sunscreen station, and wind clips for tablecloths.
Two-Hour Day-Of Schedule (gentle rhythm)
Protect the cake moment, keep the flow light, and let goodbyes happen naturally.
- 0:00–0:20 Hellos, snacks out, soft music, kids explore play corner
- 0:20–0:40 Photos at the backdrop (best light, happiest faces)
- 0:40–1:00 Grazing + play; refill waters and coffee
- 1:00–1:15 Cake & “Happy Birthday”
- 1:15–1:40 More play, casual goodbyes, offer favors
- 1:40–2:00 Quick tidy, pack leftovers, baby wind-down
If you fall behind: move cake up; everything else flexes around that moment.
FAQs
How long should a first birthday party be?
90–120 minutes is the sweet spot.
What if my baby melts down during photos or cake?
Pause, cuddle, try again later—or skip it. Clean-hands cake photos are just as darling.
Do we need entertainment?
No. A soft play corner, bubbles, and two songs before cake are perfect for this age.
Open gifts during the party?
Optional. If yes, keep it brief or wait until most guests leave and do it with grandparents.
Is a smash cake necessary?
Not at all. Alternatives: cupcake with a candle, a small fruit “cake,” or simply singing and clapping.
How do I handle mixed ages (crawlers + preschoolers)?
Place the little-kid mat away from the door; set a sticker-crown table or bubble station for older kids.
Any tips for tiny spaces?
Shrink the guest list, keep décor vertical (backdrop), use a single food table, and park strollers by the entrance.
Before you go, want the printable?
🎉 You’re ready to plan a beautiful first birthday!
Before you go, make sure you’ve got your free printable First Birthday Party Checklist — it’s the easiest way to stay organized, calm, and totally ready for your baby’s big day. 💕
👉 Yes, Send Me the Free Checklist!No spam ever — just helpful planning tips for busy moms like you. 💌