

Planning a gender reveal and want the moment to feel magical on camera and stress-free in real life?
These gender reveal cake ideas are cute, modern, and built for a clean, photogenic slice—neutral outside, bold color inside, textures that pop on phones, and reveal methods that read on the first cut.
Inside you’ll find a 60-second primer, fast flavor picks, and 30+ cake ideas grouped by vibe so you can scroll, pick, and screenshot for your baker.
Ready to slice?
Gender Reveal Cake Ideas and Tip For You
What Is a Gender Reveal Cake? (Quick Primer)
How the secret stays sealed and the slice reads clearly in one simple plan.
Keep it secret: Hand the sealed gender envelope to your baker (or a friend).
Reveal with contrast: Ask for saturated color inside (no beige pastels).
Plan the cut: Mark the prettiest side and use a warm knife.
Bonus tip: Ask your baker (not you!) to test a slice for color pop.
Easy Ways to Do the Reveal (5 Methods That Work)
Pick one reveal method that photographs well and is easy to execute.
Tinted filling: White cake + bold buttercream between layers.
Candy core: Hollow center with sprinkles/M&M’s that spill out.
Ombre layers: Interior fades to the reveal color—gorgeous in photos.
Word inside: Piped block letters (“girl/boy”) between layers.
Cupcakes + cake: Guests vote with cupcakes; you slice the cake for the answer.
Best Flavors & Fillings for Gender Reveal Cakes
Choose light cake + bright filling so the color pops on phone cameras.
Most reliable: Vanilla/white velvet + tinted vanilla or Swiss meringue.
Bright but simple: Almond or lemon cake + bold buttercream.
Funfetti: Keep the filling super bright so it wins the photo.
Chocolate outside? Reveal with white filling inside for contrast.
Skip: Berry fillings for the reveal slice—they photograph red/purple.
Ordering Timeline & Day-Of Tips
Book early, hand off the envelope, and prep a smooth, photo-ready cut.
2–4 weeks out: Book cake, choose look, servings.
Ultrasound day: Deliver sealed result to baker.
Pickup day: Chill to travel, then set out 1–2 hours before slicing.
Reveal: Warm knife, wipe between cuts, slice slowly, lift toward camera.
Mini Gender Reveal Cakes (Smart Strategy)

Three minis = one perfect slice on camera, a backup, and a gift for grandparents.
Order three 4–6″ minis: one to cut on camera, one for backup photos, one for grandparents.
Bonus tip: Label stands underneath (1 = video, 2 = photos, 3 = gift).
30+ Gender Reveal Cake Ideas (By Style)
Skim the styles, screenshot a favorite, and hand it to your baker.
Classic & Clean
1. Neutral Outside, Color Inside – Smooth buttercream; bold interior.

2. Macaron Tower Drip Cake – Smooth pink buttercream with teal drip, two-tiered ringed in pink/blue macarons, and rose topper; dramatic height and super photogenic slices.
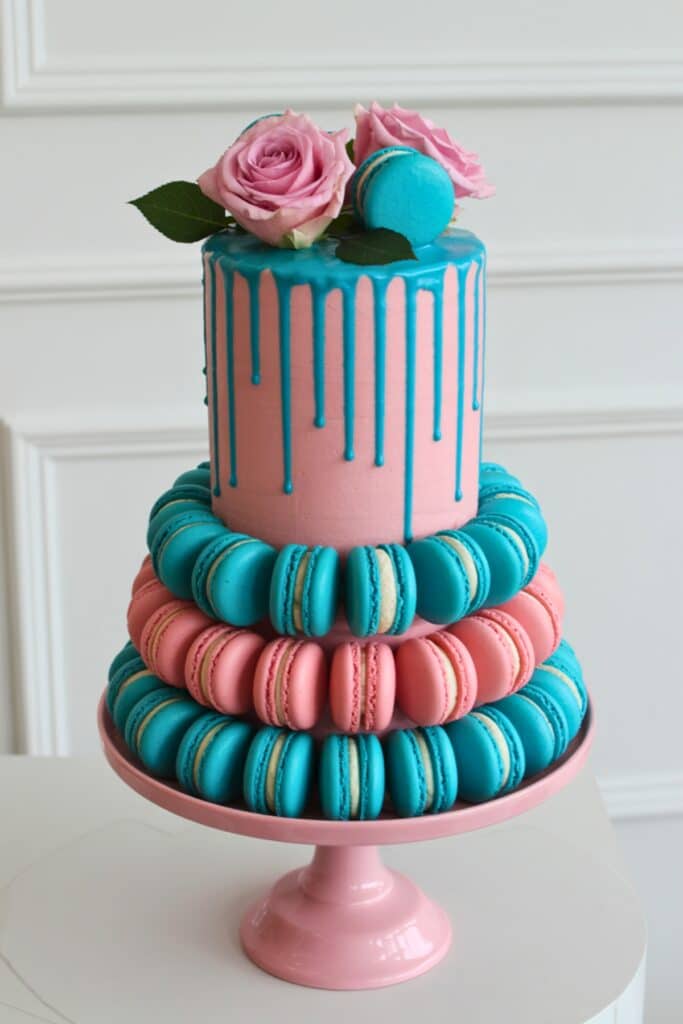
Bonus tip: ask for a bright interior color so it doesn’t compete with the vibrant macarons.
3. Gold Leaf Kiss – Minimal flakes; saturated inside.
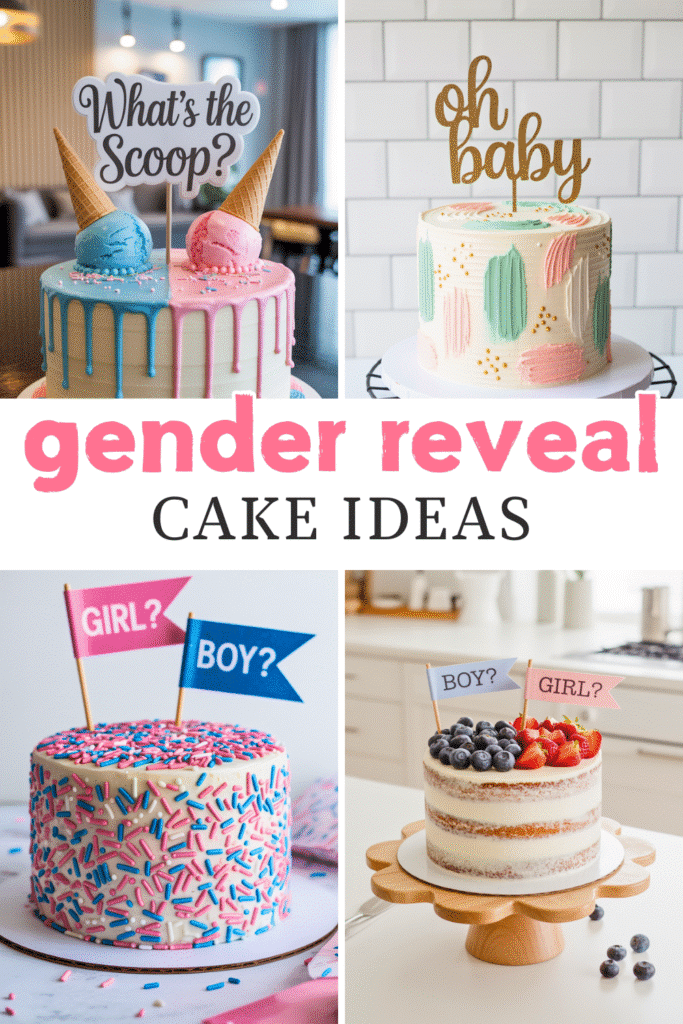
4. “What’s the Scoop?” Ice Cream Drip Cake – Half-and-half pink/blue drip over smooth buttercream with sprinkle border and two ice-cream-scoop toppers in waffle cones.
Add a bold reveal color inside for a super clear slice photo.

Bonus tip: place the topper high and centered so it doesn’t block the cutting spot.
5. Semi-Naked Modern – Light scrape; neon-bright filling.
6. Stork “It’s a…” Cake – Smooth neutral buttercream with a fondant stork and mini hearts on top, plus “It’s a…” lettering; tuck a tiny pink/blue bundle prop beside the stork and keep the inside color bold for a clear slice photo.

7. Tall & Skinny Stack – 6–7 layers for wow slices.
8. It’s a… Hearts” Cake – Smooth white buttercream with black “It’s a…” on top and pink/blue fondant hearts all around; super clean look that photographs beautifully.

Texture & Trend
8. Palette-Knife Design – Painterly waves; bold interior color.
9. Pastel Ombre “Boy or Girl” Cake – Smooth buttercream in pink→yellow→mint ombré bands with a wooden “Boy or Girl” topper; simple, modern design that photographs beautifully.

Bonus tip: ask for deeper interior color so the slice reads clearly against the soft exterior.
10. Rosette Wreath – Rosettes on top only; message inside layers.

11. Rustic Swirls – Thick cozy texture; tinted filling.
12. “Girl or Boy?” Sprinkle Cake – Smooth white buttercream fully coated in pink/blue sprinkles with two mini flag toppers; keep the inside color bold for a super clear reveal slice.

Bonus tip: ask your baker for saturated gel color in the filling so it beats the busy sprinkle texture on camera.
13. Wafer-Paper Frills – Ethereal frills; bright interior.
14. Gingham Gift-Box Cake – Tall buttercream cake wrapped in teal checker/gingham fondant panels with a large blush bow; clean lines and height make the slice look dramatic.
WANT TO SAVE THIS FOR LATER?
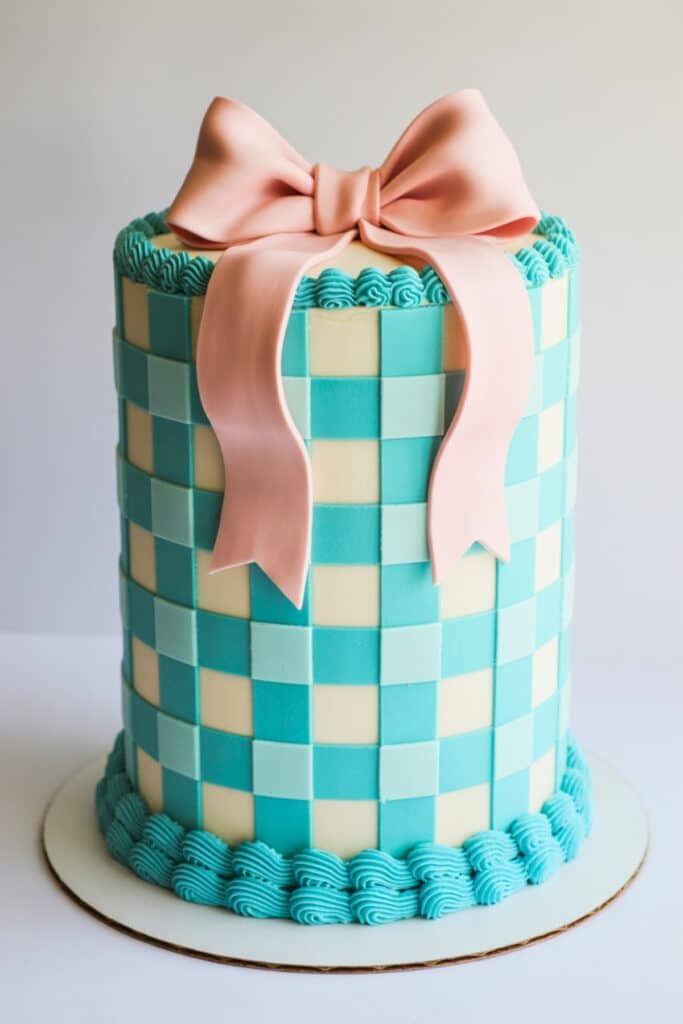
Bonus tip: ask for a vivid interior color so it contrasts the pale exterior in photos.
15. Vintage Lambeth – Retro piping; candy-core surprise.
Surprise-Inside Moments
16. Sprinkle Piñata – Candy spill when you cut.
17. Mini M&M Core – Color that pours out on video.
18. Confetti Layers – Funfetti + bold buttercream between.
19. Checkerboard Slice – Advanced, super photogenic squares.
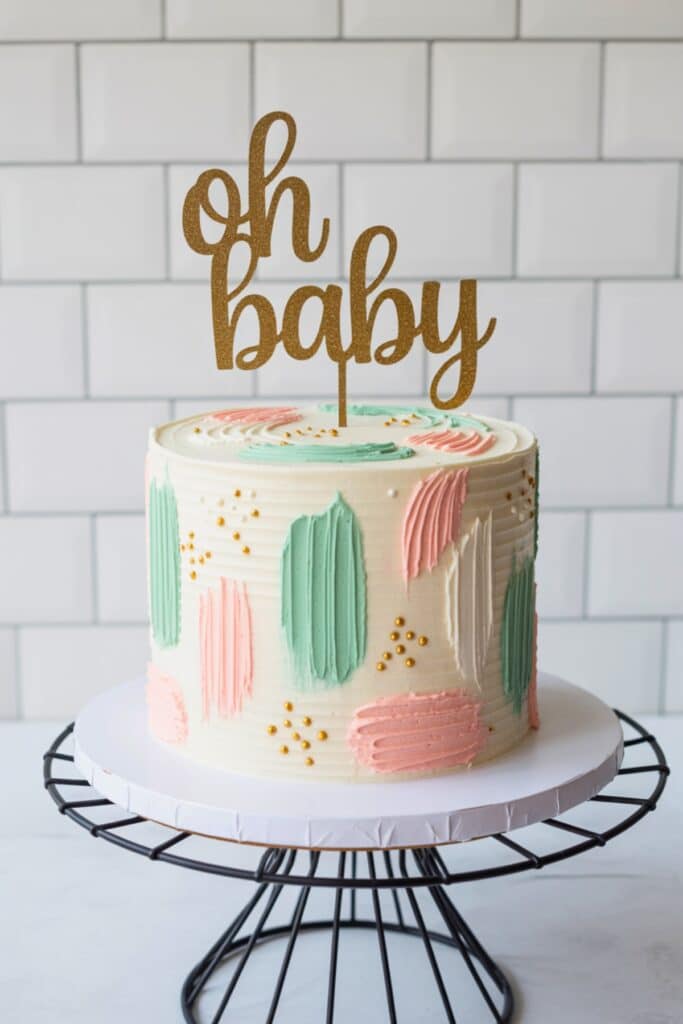
20. Ombre Inside “Baby” Topper Cake – White buttercream with soft ridged texture and a glitter “Baby” topper; cut to reveal saturated ombré layers (use bold pink or blue so the color reads clearly in photos).

Bonus tip: ask for 5–6 thin interior layers for a dramatic slice.
21. Message-in-Middle – “Girl/Boy” piped between layers.
Soft Motifs (Modern, Not Cheesy)
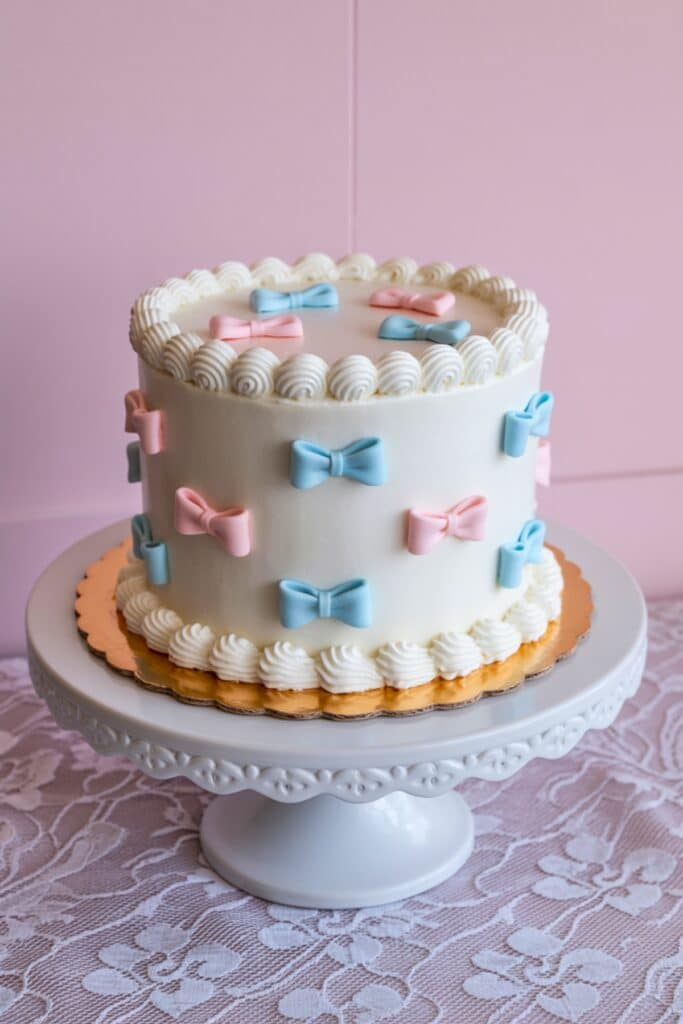
22. Tiny Bows – Micro bows around cake; reveal inside.
23. Daisy Chain – Mini daisies + lemon cake, tinted filling.
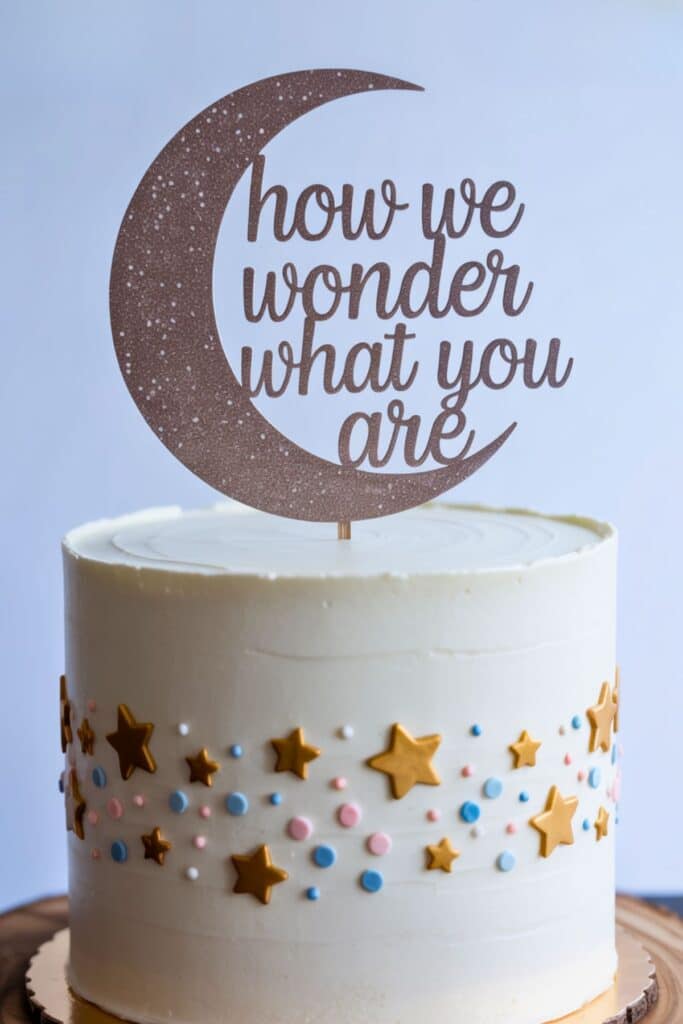
24. Moon & Stars – Simple moon topper; galaxy-blue or blush interior.
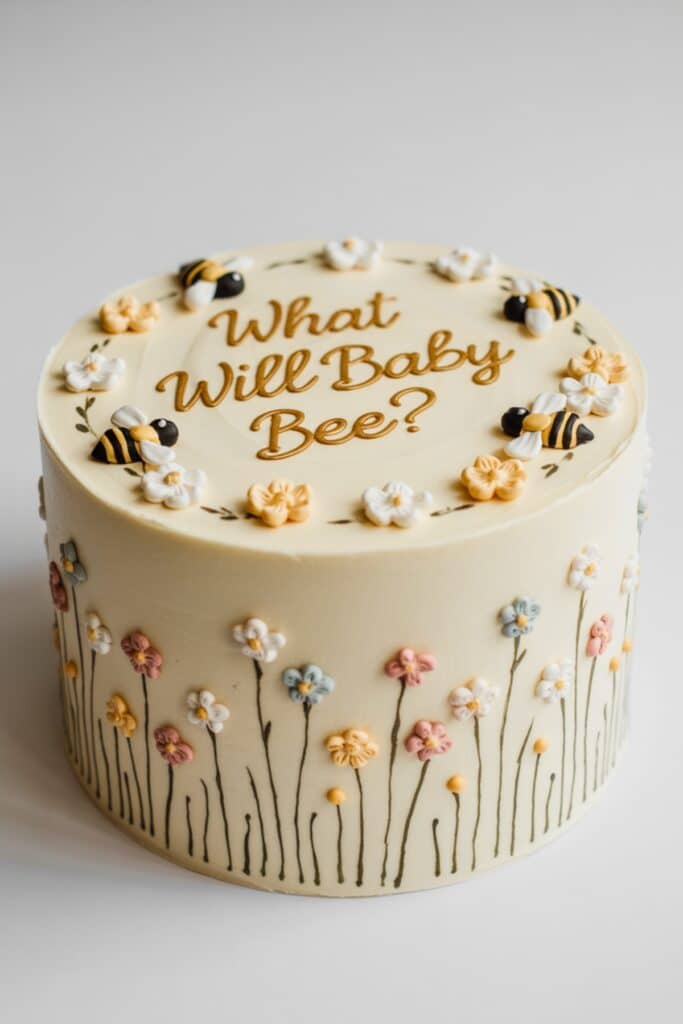
25. “What Will Baby Bee?” Cake – Smooth ivory buttercream with tiny piped wildflowers around the sides and cute fondant bees on top; gold script “What Will Baby Bee?” and a bold color inside for a clean reveal slice.
26. Watercolor Wash – Neutral brushstrokes; saturated middle.
27. Monogram Topper – Baby initial; color in the slice.
28. Stamped Plaque – Small fondant plaque; reveal via cut.
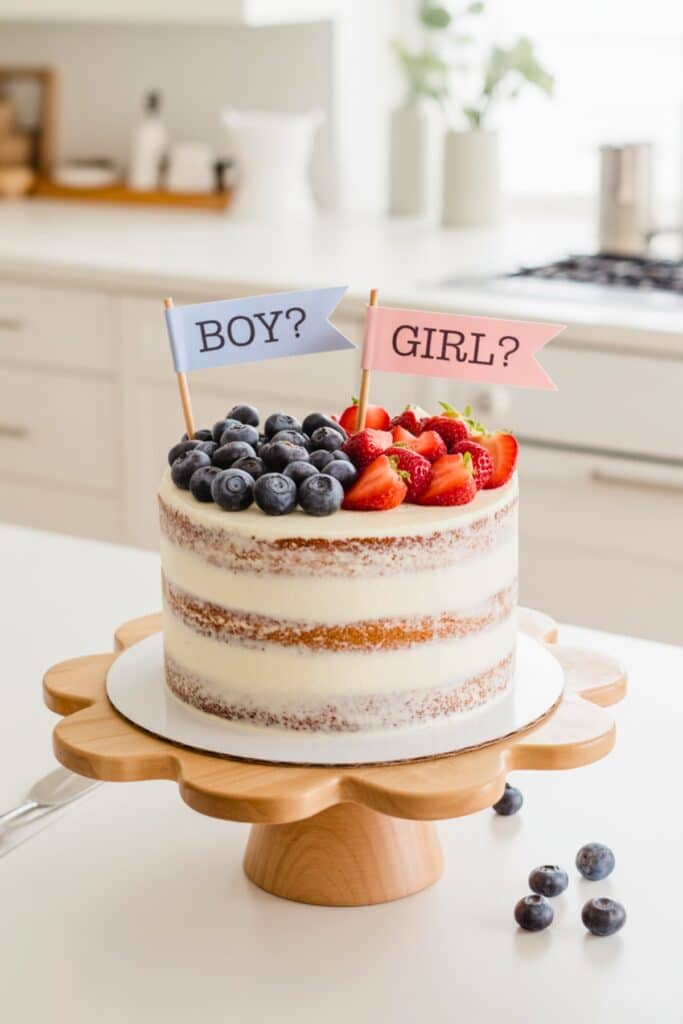
29. Fruit-Crowned – Berries on top; keep exterior neutral for contrast.
30. Dried Citrus + Greens – Trendy garnish; vivid interior.
Party-Table Combo
31. Mini Balloon-Arch Topper + Clean Slice
What it is: A short tabletop balloon arch (or mini garland) sitting behind the cake as a backdrop.
The cake itself stays smooth/neutral outside with a bold reveal color inside.
Why it works: The arch frames faces in photos, but because it’s short, it doesn’t block the topper or the cut.
How to set it up (2–5 minutes):
- Put cake on the tallest stand.
- Place a mini balloon arch (12–20 mini balloons) directly behind the cake, not attached to it.
- Keep the arch’s peak lower than the topper.
- Mark your slice spot on the back of the cake with a toothpick.
Photo cue: Stand centered, arch in the background, pause with the slice lifted.
Quick list: mini arch kit (small balloons), hand pump, cake stand, topper.
32. Vote-and-Slice Station
What it is: Two trays of mini cupcakes—one labeled Team Girl, one Team Boy—with one reveal cake in the middle. Guests “vote” by taking a cupcake. You still reveal by cutting the cake.
Why it works: Instant guest interaction = longer hang time at the table (great for photos + RPM), but the reveal moment is still the clean slice.
How to set it up (2–5 minutes):
- Center the reveal cake on a stand.
- Left tray: pink-topped minis + “Team Girl” sign. Right tray: blue-topped minis + “Team Boy” sign.
- Put tally cards or a tiny whiteboard in front (optional).
- Keep knife/plates in front so you can move straight to the cut.
Reveal flow: Guests vote → you gather everyone → count hands if you want → slice the cake for the answer.
Quick list: 24–48 minis (pink & blue), two small trays, two label cards, the main reveal cake, knife/plates/napkins.
7) Photo Tips for the Slice Moment
A bright window, a warm knife, and one marked slice spot = perfect shot.
Face a window or open doorway; turn off harsh overheads.
Warm knife, wipe between cuts.
Mark slice spot with a toothpick on the back of the stand.
Pause and smile with the slice lifted toward the camera.
Backup plan: Keep a smooth “photo slice” mini in the fridge (same inside).
Trends to Skip for Gender Reveal Cakes
If it distracts from the slice photo, skip it and keep the design simple.
Giant balloon boxes perched on cakes.
Dark “scratch-off” coatings that smudge.
Over-tinted pastel exteriors (look muddy on phones).
Pull-apart cupcake numbers for the reveal moment (fun, but weak slice photo).
9) Gender Reveal Cake FAQs
Quick answers for ordering, DIY color, and tiny-at-home reveals.
How many servings should I order?
Guests + 10% for second slices and photo do-overs.
Can I DIY the color?
Yes—use white buttercream base and gel color; go brighter than you think.
What if we’re keeping it tiny at home?
Get a 6″ tall cake for dramatic slices on camera, or two minis (one to cut, one for photos).
Ready to Slice? (Final Takeaway)
Your gender reveal cake doesn’t have to be complicated to be unforgettable—neutral outside, bold color inside, and one photo-ready cut is all it takes.
Pick a style you love, hand the sealed envelope to your baker, and mark that slice spot so the moment reads perfectly on camera.
If you’re still deciding, start with a texture-forward design and a bright white-cake + tinted filling combo—it photographs beautifully every time.
Next up: pair your cake with simple gender reveal games, easy decor ideas, and crowd-pleasing party snacks for a complete, low-stress celebration. And don’t forget to pin this guide so you can show your baker the exact look you want.
Pin or Share
Pin this guide to save your favorite cake ideas for later.
Shop the basics: offset spatula, tall cake scraper, gel colors, disposable piping bags (link where you like).